As I descend into the cosmic labyrinth of Salvation's Edge in 2026, I'm reminded that the thrill of discovery remains the beating heart of Destiny 2's most challenging content. From the hallowed halls of the Vault of Glass to the Witness's own domain, hidden chests have been the silent witnesses to our triumphs, offering not just loot, but secrets and stories. These caches are more than just reward dispensers; they are like forgotten stanzas in a cosmic poem, waiting for the right fireteam to recite them. In Salvation's Edge, this tradition is not only alive but has evolved into a complex tapestry of secrets, offering Guardians pathways to coveted red-border weapons and unique cosmetic rewards. While the core rule remains—these chests only yield loot you've already earned from encounters—they are invaluable for chasing those perfect god-rolls on raid gear and inching closer to unlocking craftable weapon patterns. Let me guide you through the shadows of this raid to claim what's hidden.
The Two Triumph Chests: Shrouded in Orange Metal and Ancient Roots
Salvation's Edge holds two primary hidden chests tied to a specific Triumph. Finding them is a test of observation, rewarding you with more than just gear.
First Hidden Chest: The Metallic Alcove
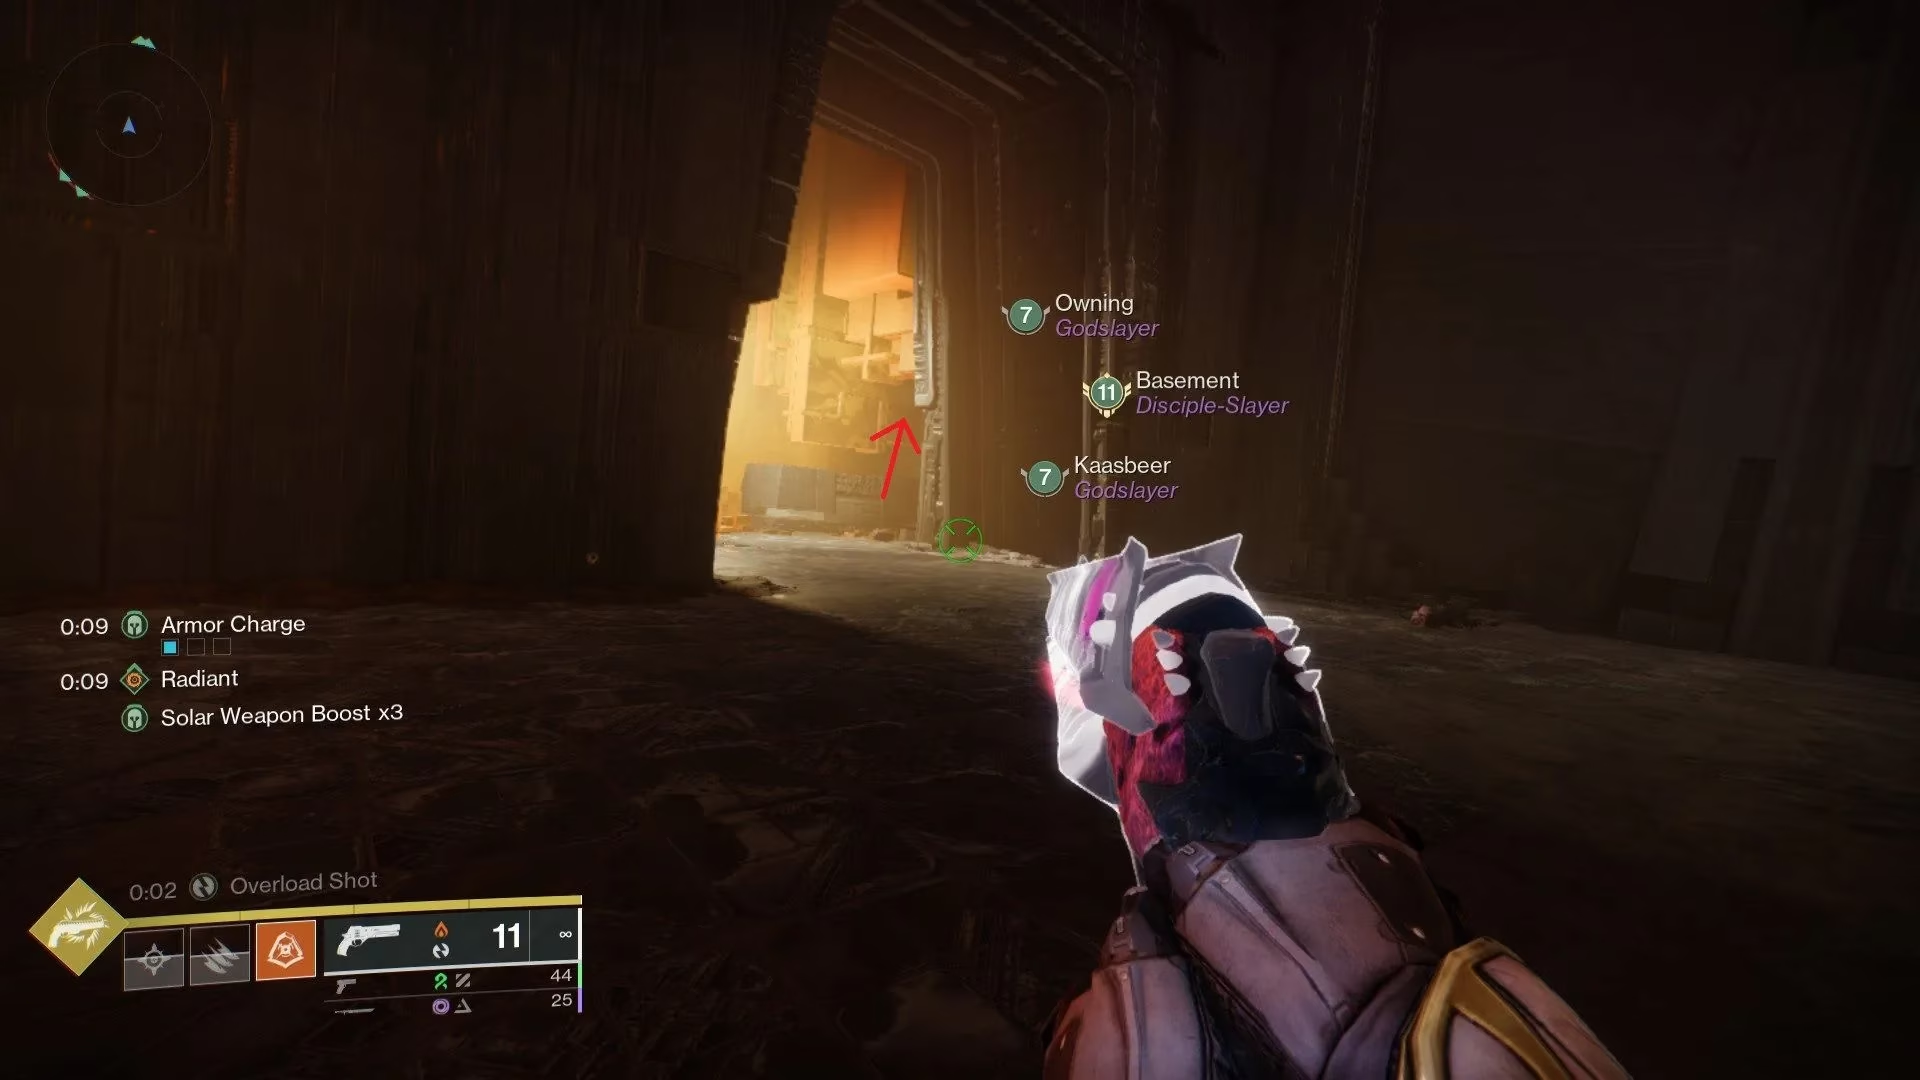
This chest is nestled between the raid's second and third encounters, within the lengthy platforming section. Your landmark is an area predominantly constructed from a strange, metallic orange substance, resembling solidified solar plasma. This spot appears near the very end of the jumping puzzle. As you navigate this section, keep your eyes peeled for a small, almost invisible crevice in the corner of a wall. A well-timed jump into this gap reveals a hidden chamber, a secret pocket dimension where the first chest rests.
Second Hidden Chest: The Temple's Veiled Heart
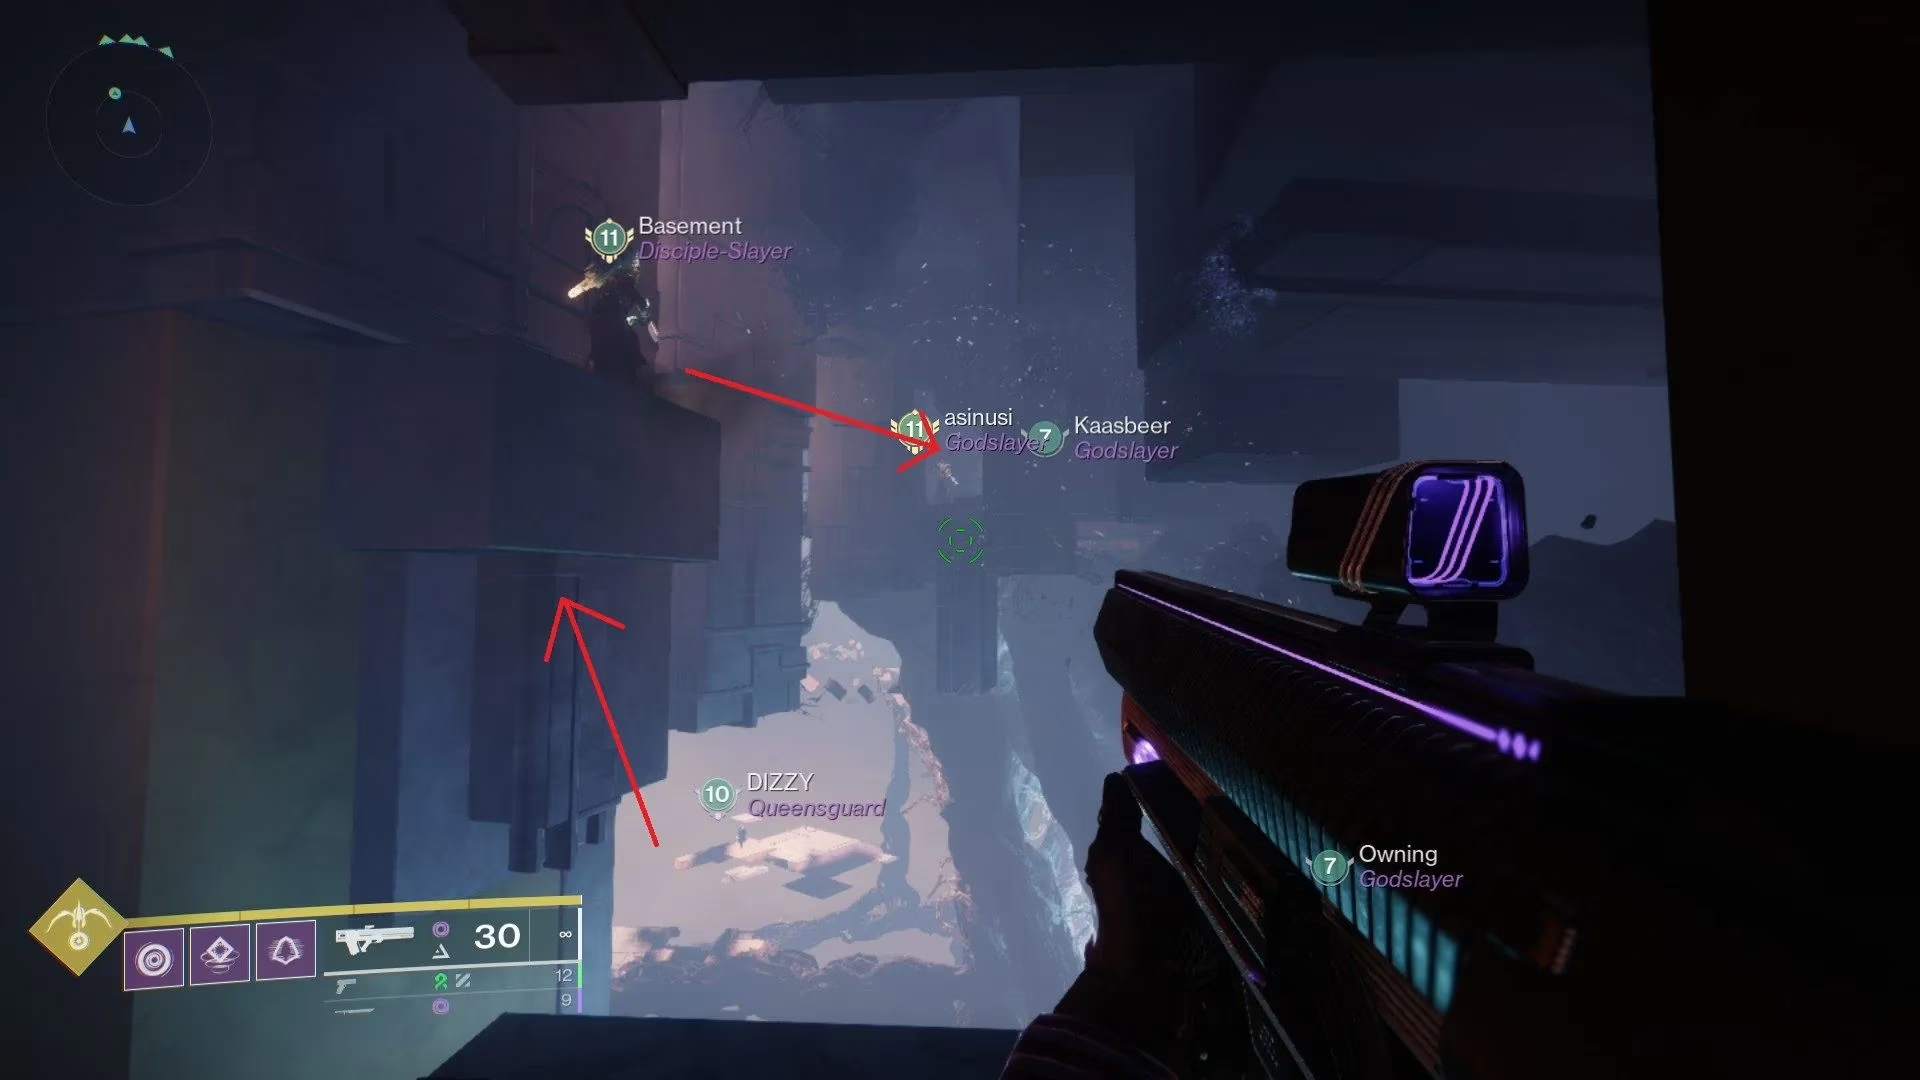
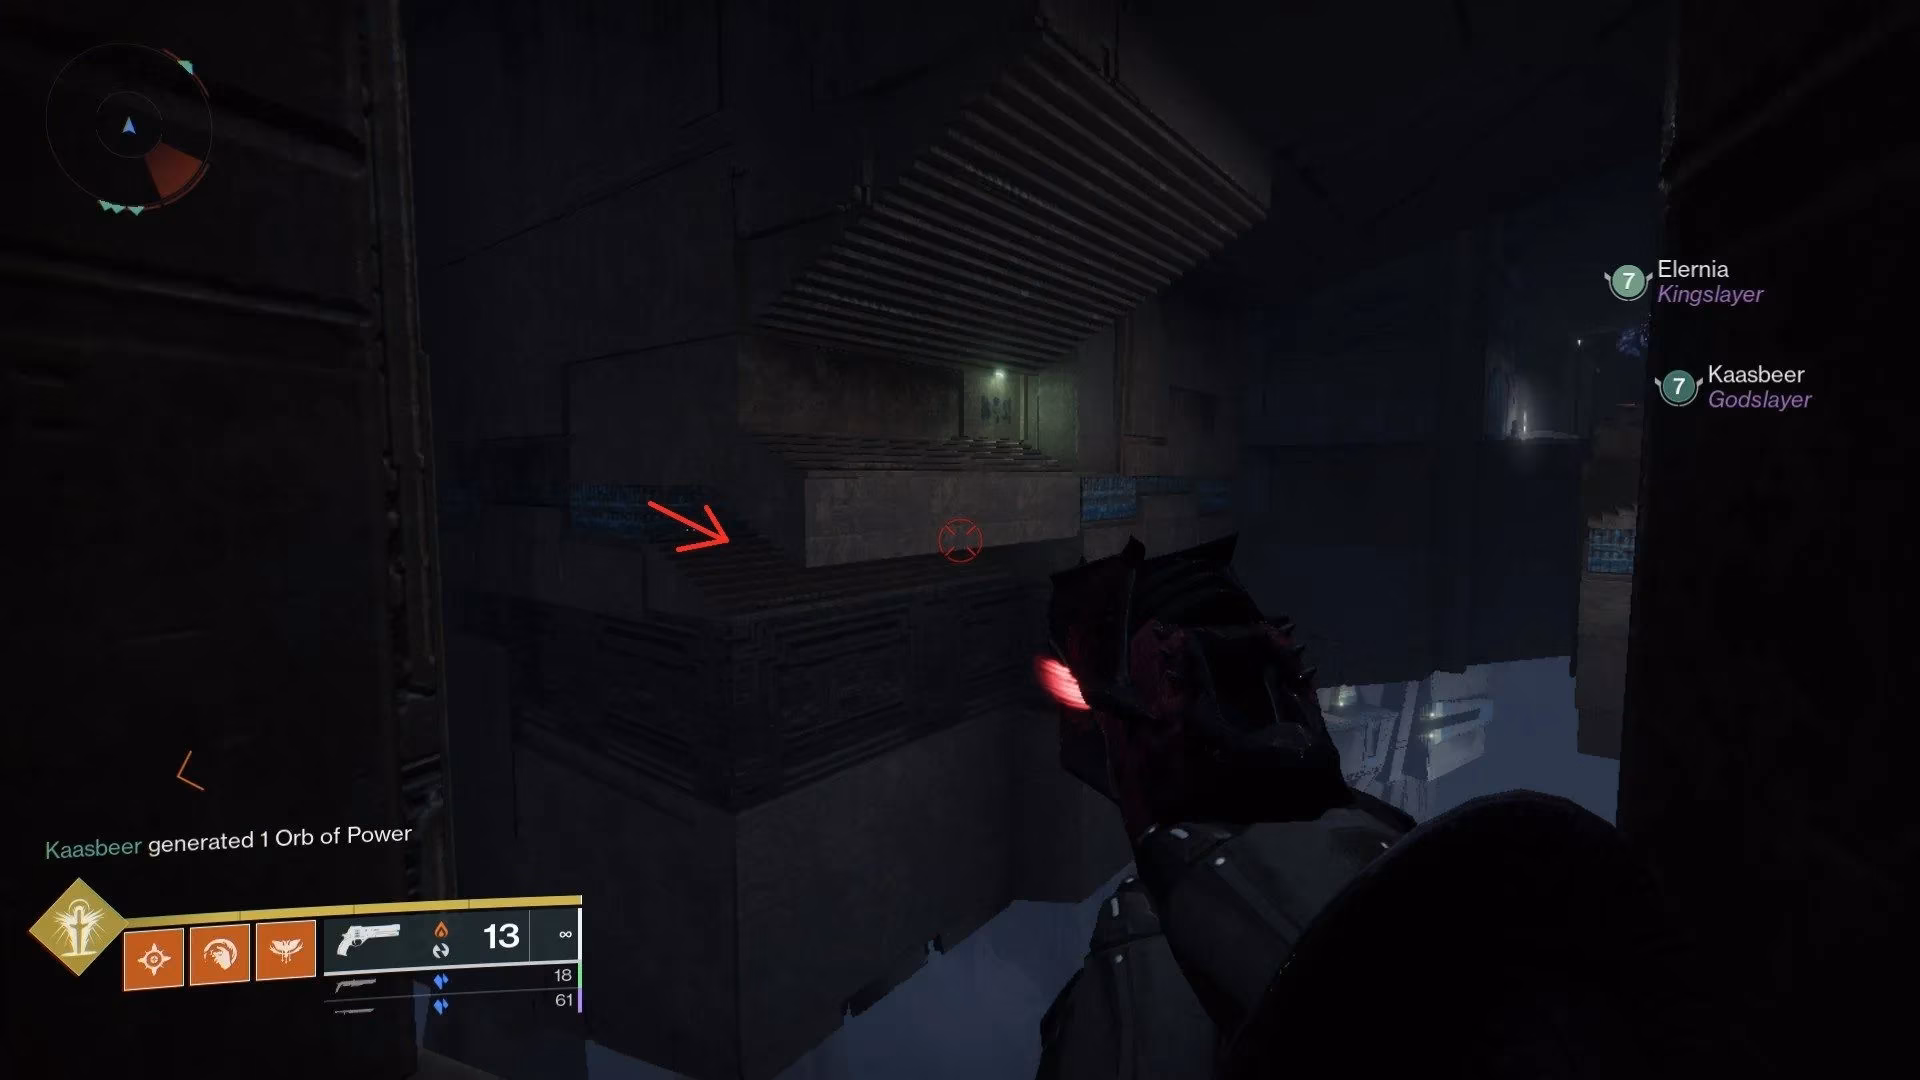
The final standard hidden chest awaits near the climax of the raid, after you've bested the fourth encounter and are ascending toward your final confrontation. In the area where the Witness's eerie, pulsing roots fuse with the ancient temple architecture, you must search for a specific confluence. Look for a small, concealed room—a architectural afterthought hidden in plain sight. The image below points the way. A precise jump is required to reach this alcove, which feels less like a room and more like a glitch in the Witness's reality, a secret even it might have forgotten.
Securing both of these chests unlocks the 'Resonance Cellweave' shader Triumph. It's a badge of honor for explorers, though I must temper expectations—it does not increase your chances for the raid's elusive Exotic drop. Think of these chests not as shortcuts to power, but as the raid's way of acknowledging your thoroughness, like a master archivist leaving a personal note in a margin for a diligent researcher.
The Red Border Puzzle: A Weekly Ritual of Resonance
Beyond the Triumph chests lies a third, more elusive prize: a chest containing a guaranteed red-border weapon. This isn't found but earned through a weekly puzzle that spans the entire raid, a challenge that turns the environment itself into a cryptic lockbox.
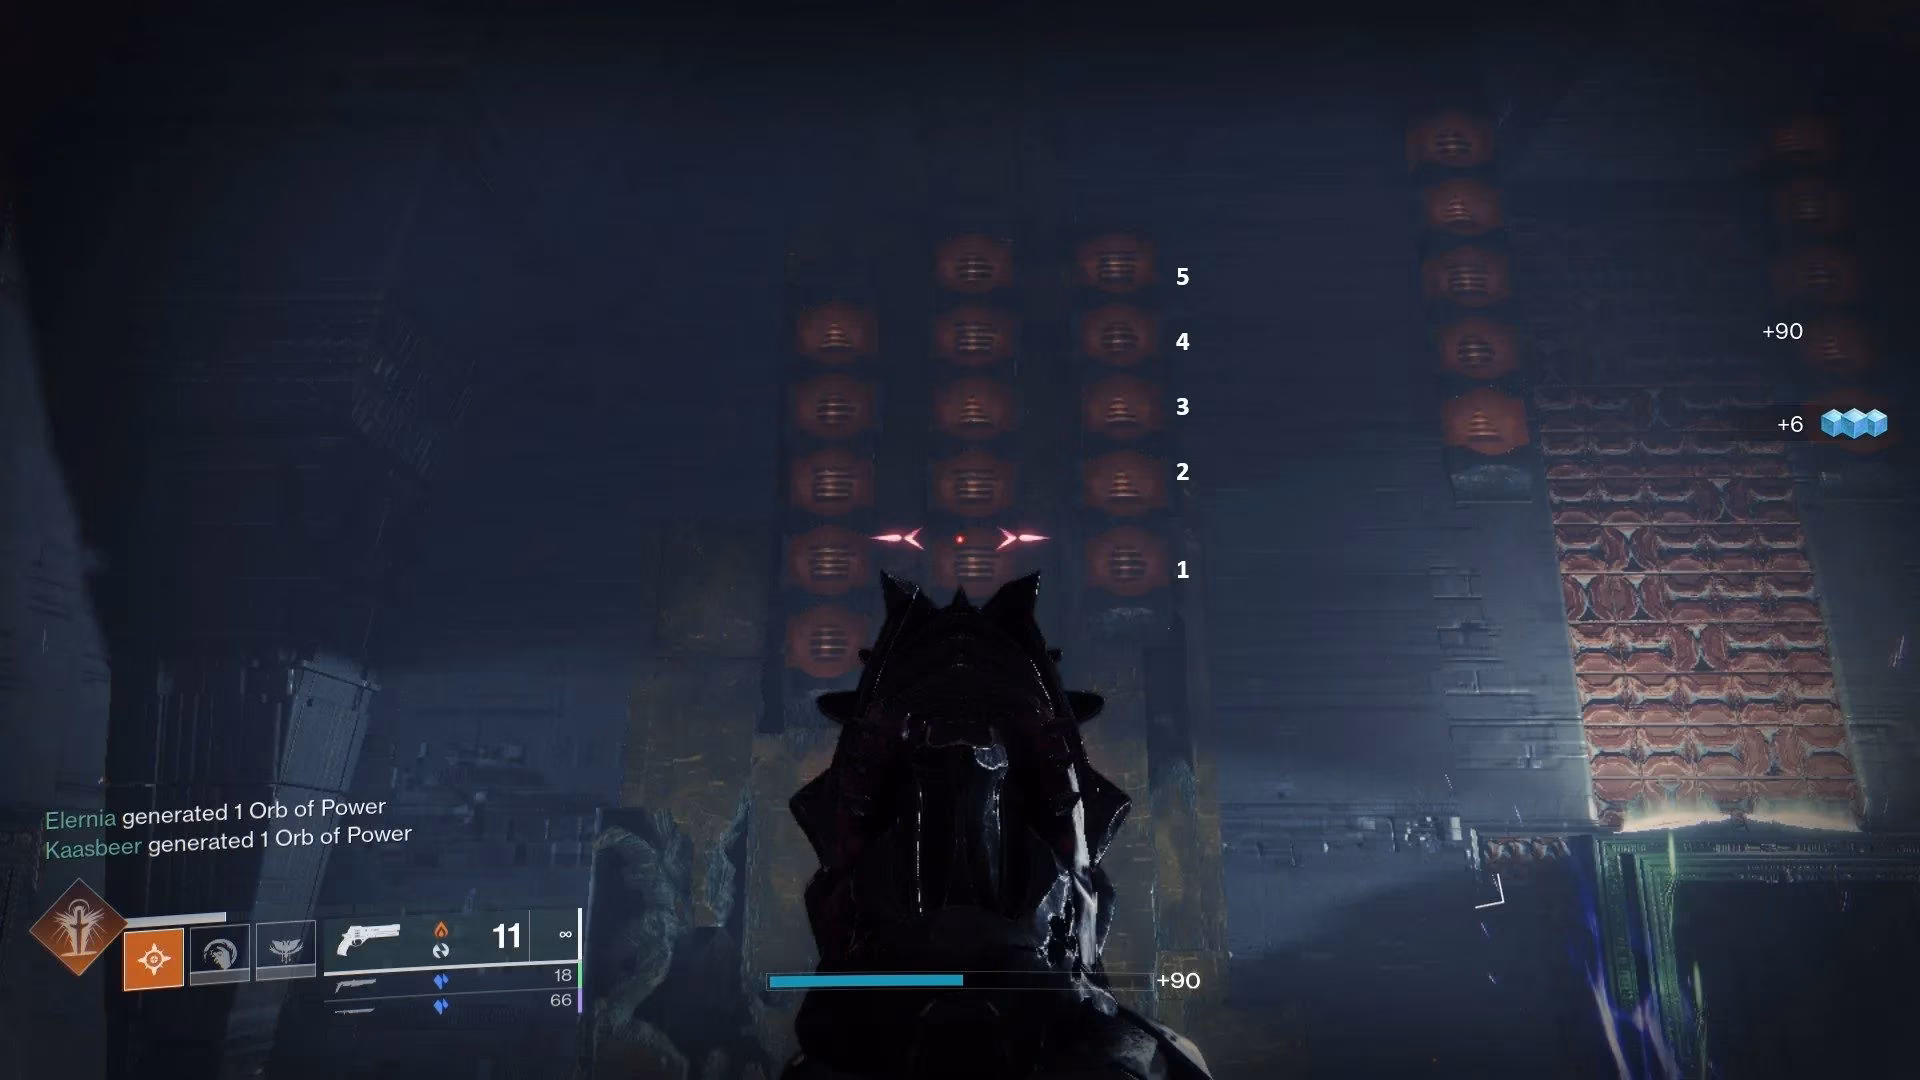
The puzzle begins at the raid's very start. In the initial large chamber, you'll find an elaborate wall design featuring eight rows of symbols. These symbols mirror the Resonance shapes that are central to the raid's mechanics. Focus on the third column from the left. This column holds the key for the entire run, its symbols—from bottom to top—indicating the specific type of Resonance (Strand, Stasis, etc.) required to 'close the circuit' in five hidden puzzle rooms scattered throughout the raid.
Crucially, only three of these five rooms are active each weekly reset. An active room will have a clearly glowing pillar; an inactive one will be dark. You must find and complete the three active rooms using the Resonance type dictated by the wall's column for that room's position. Below is your roadmap to these clandestine chambers:
| Room # | Location & Landmark | Status Indicator |
|---|---|---|
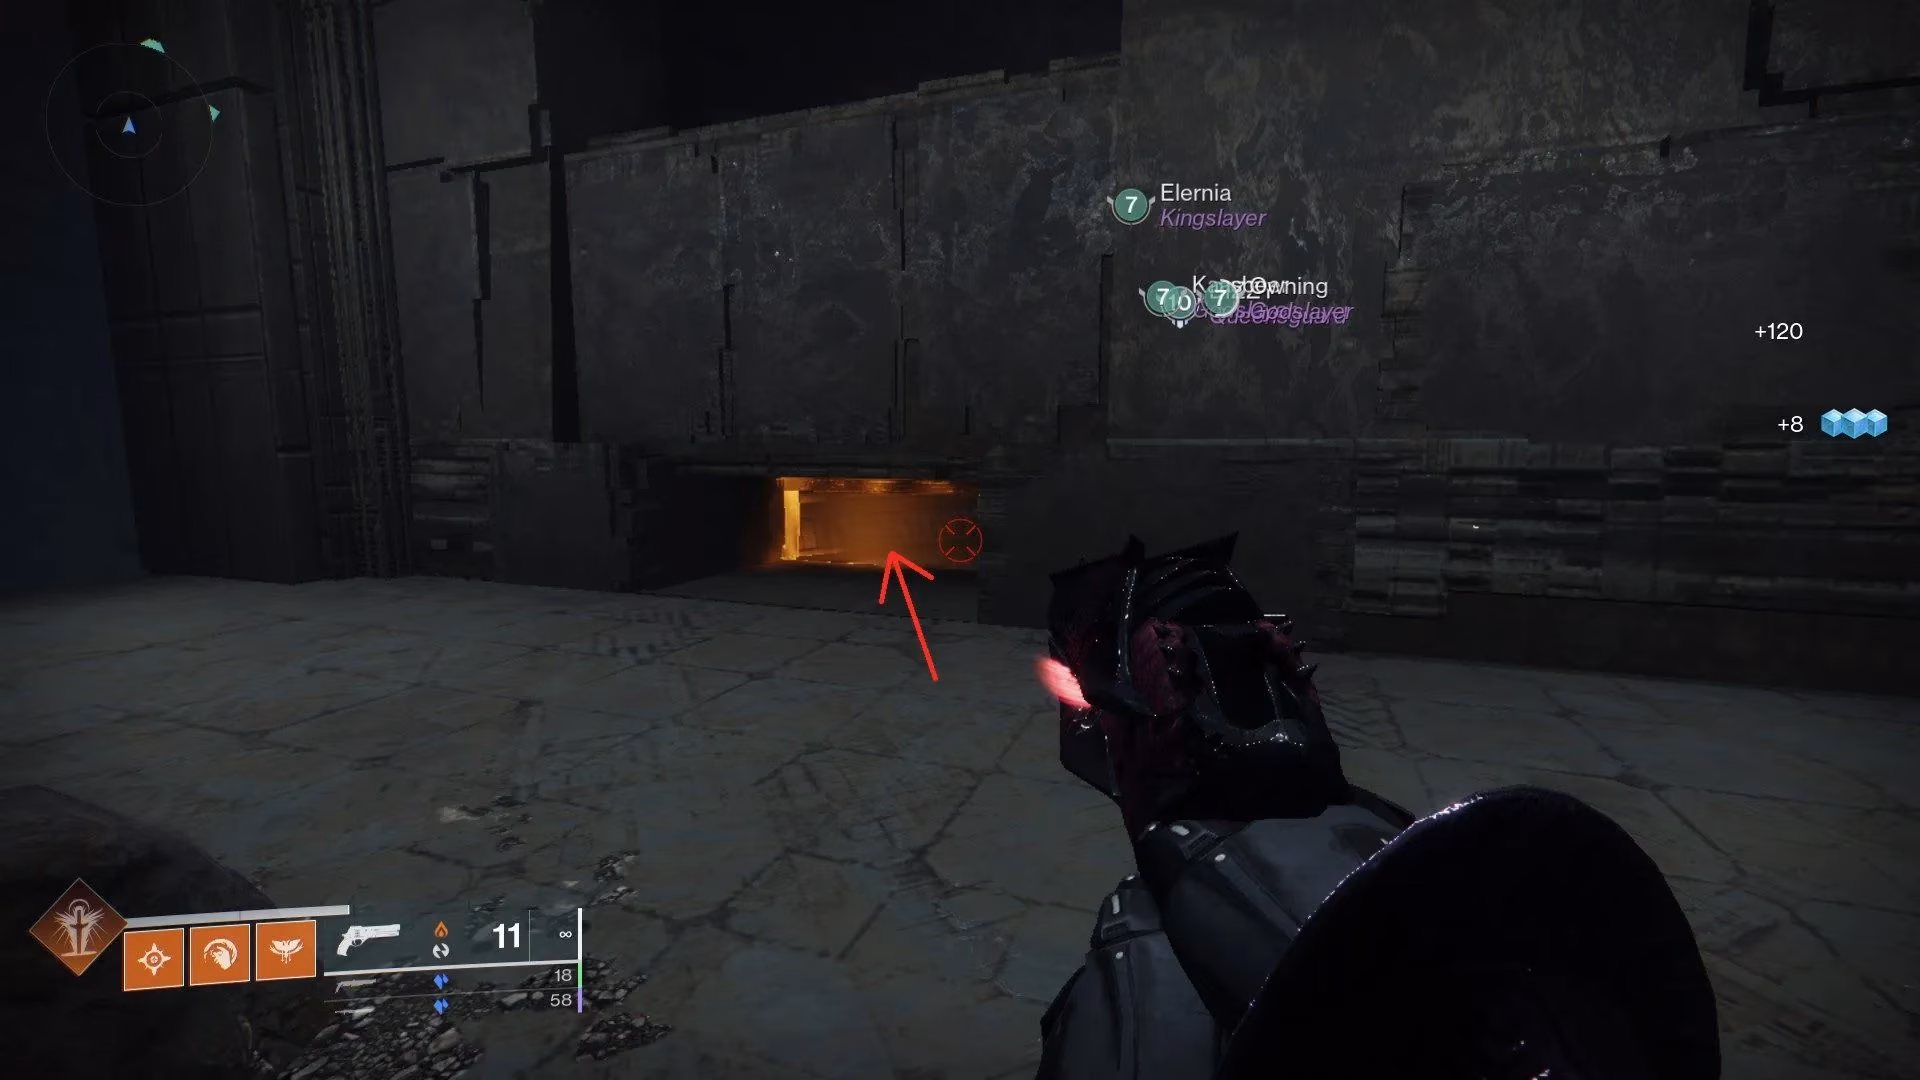
| 1 | In the first platforming section (pre-first encounter). Find a narrow opening in a wall, then a glowing orange crawlspace on the right. | Glowing pillar inside. |
| 2 | Just before the first encounter. Locate two sets of stairs leading to a dead end. Jump to the bottom stairs to find a hidden hallway. | Glowing pillar inside. |
| 3 | After the first encounter. Ride the gravity lift and jump the green blocks. Look right for a distinct window frame (near the Witness's "fall on its knife" dialogue). | Glowing pillar inside. |
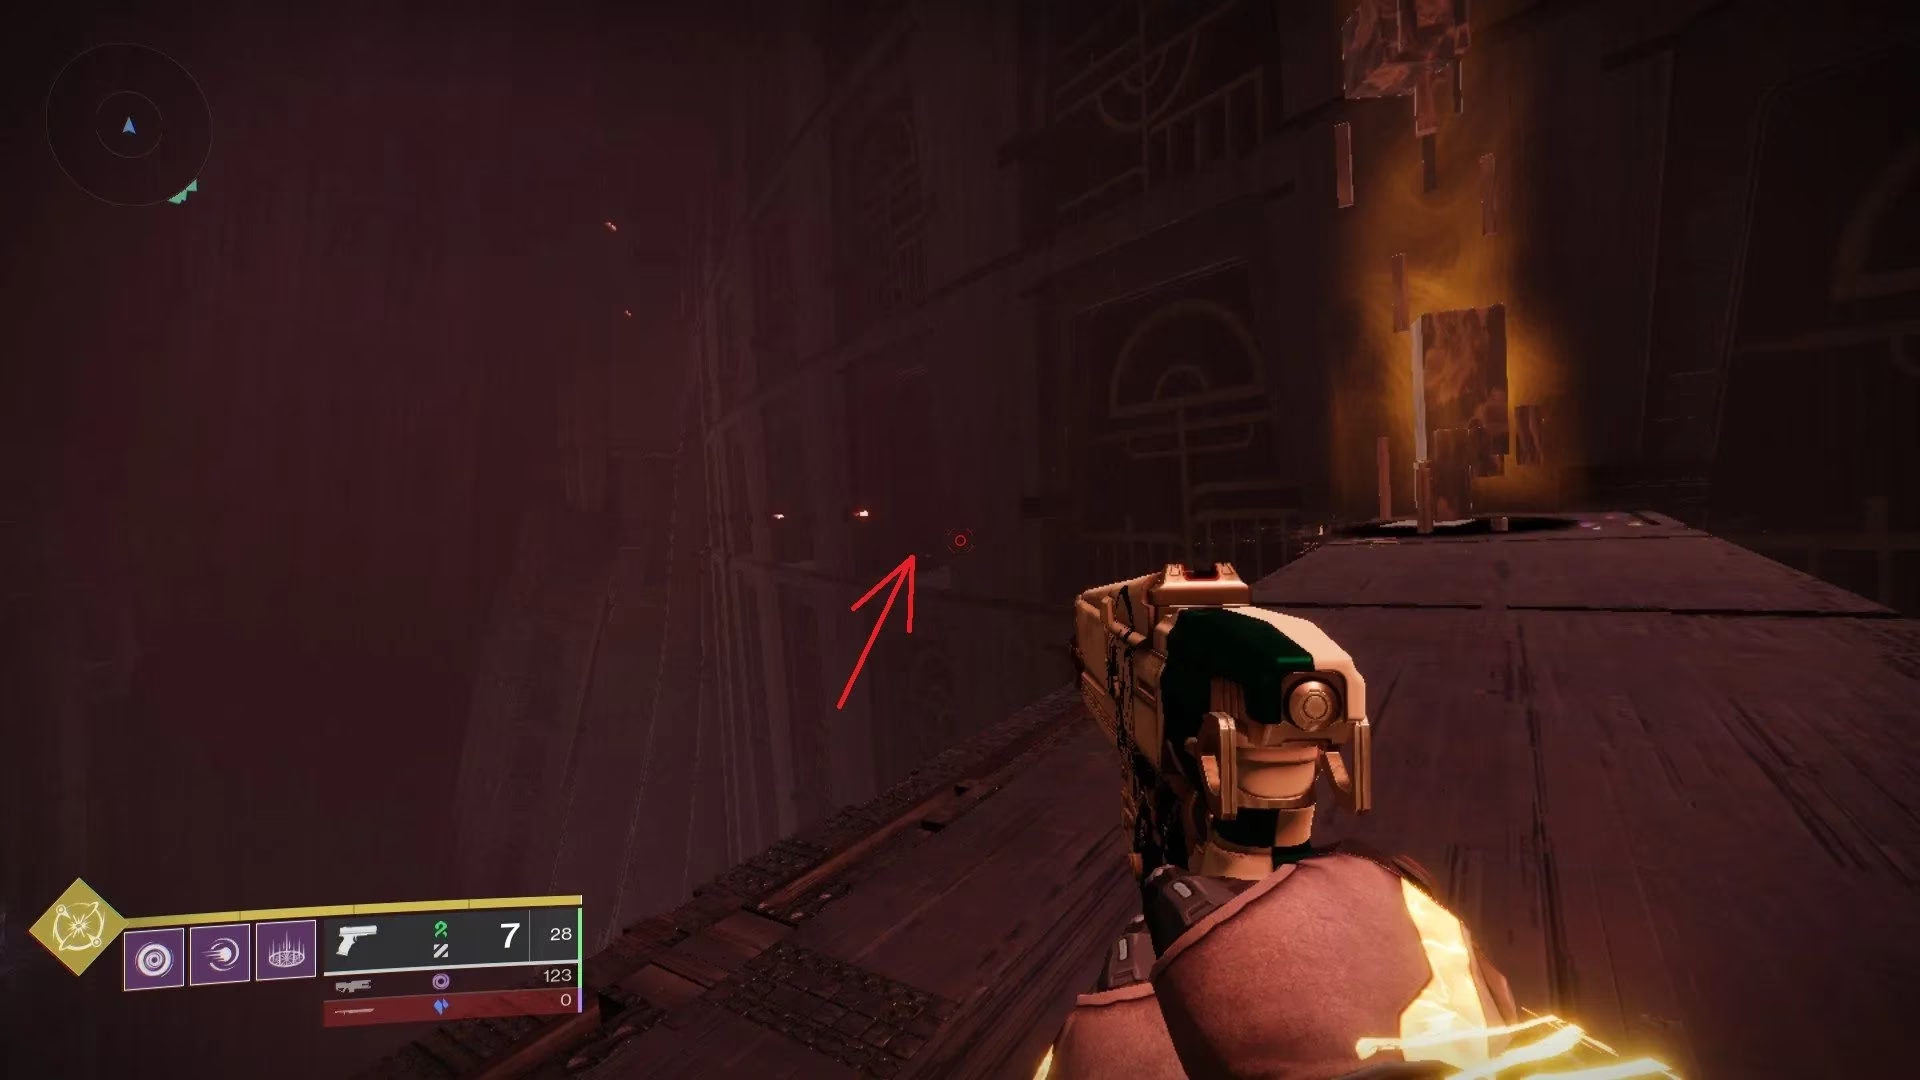
| 4 | After clearing the second encounter. While passing the energy beams, find a small room on the left wall. | Glowing pillar inside. |
| 5 | On the path to the fourth encounter. Early in the platforming, look left for a cluster of orange blocks and jump up. | Glowing pillar inside. |
Room 1: Navigate the initial platforms and find the tell-tale narrow opening.
Room 2: Discover the hidden hallway beneath the dead-end stairs.
Room 4: Spot the small chamber along the wall amidst the energy beams.
Once you have successfully charged all three active rooms with the correct Resonance, simply complete the raid. Your reward comes not from a chest you open, but from one that opens for you. When the Witness retreats in the final moments, a second chest will materialize and unlock automatically, granting you that precious guaranteed Deepsight (red-border) weapon alongside your standard encounter loot. This mechanic is the raid's ultimate secret handshake, a reward for those who listen to its silent, geometric language. The process is as intricate as calibrating a ghost's memory core, requiring patience and precision each week.
In 2026, mastering Salvation's Edge means more than just combat prowess. It demands the eyes of a scout and the mind of a cryptographer. These hidden caches and complex puzzles ensure that every run can hold new secrets, making the journey to confront the Witness as rich and rewarding as the destination itself. Happy hunting, Guardians. May your curiosity be as sharp as your weapons.